These How-To's are setup in Tab form. Click on the appropriate tab to access. Tab background will be grey when selected
CREATING A WATERMARK
|
Whenever you post a photo on a public service, that image becomes fair game for other people to use, unless you make that image unique in some way. With the growth of social networks eg: Facebook, Twitter etc etc, so I think it's time for you, the user, to look at some ways in which you can ‘mark’ your digital photos to uniquely identify them as your own.
While this may not matter to some photographers, it can be pretty annoying if one or more of your images has been hijacked by someone else without your permission, and even worse that they’ve used your shots commercially without paying you for them. Sad to say it happens only too frequently To prevent such situations, images posted online (including those in your Facebook, Flickr or Picasso accounts) should be identified as your property. But, even then, images can still be hijacked without your permission; Even if you do watermark them they can still be copied and used illegally but it certainly makes it more difficult for the less scrupulous of our photography "brothers" So I have a created a "how to" using Photoshop ....... |
Step #1
To create the Watermark the best way is to use Photoshop. First step is to create a new document in Photoshop ( I like to use 10 x 8 or somewhere about that size), then add text using the Horizontal Type Tool (T). Change the font type to a font that takes your fancy - I've used one called "LittleLordFonteroy", but it can be anything. The font size around 100 points is a good place to start.
Step #2
In step 2 here I've added a 2nd layer and in that layer created a 2nd line of text. Be as creative as you like, but in my case I've used a slightly different font, and slightly smaller than the 1st text layer.
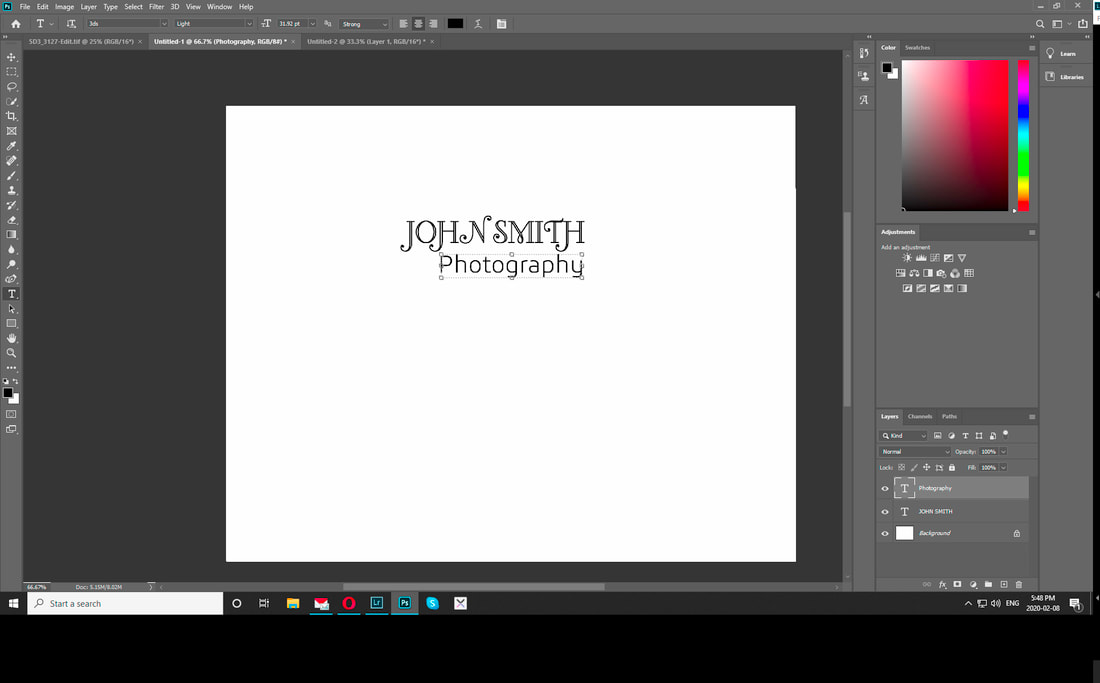
Step #3
If you feel being even more creative you can also add a graphic to compliment the text. As it's a Photography theme here I have added an image of a camera. An easy place to find great clipart is the web. Google "clipart camera" or whatever it is you are looking for then save the file somewhere you can find it later. Open that file in Photoshop, resize it , tweak it etc.
With that all done you should now be able to copy and paste onto your Watermark. Position & resize as necessary.
With that all done you should now be able to copy and paste onto your Watermark. Position & resize as necessary.
Step #4
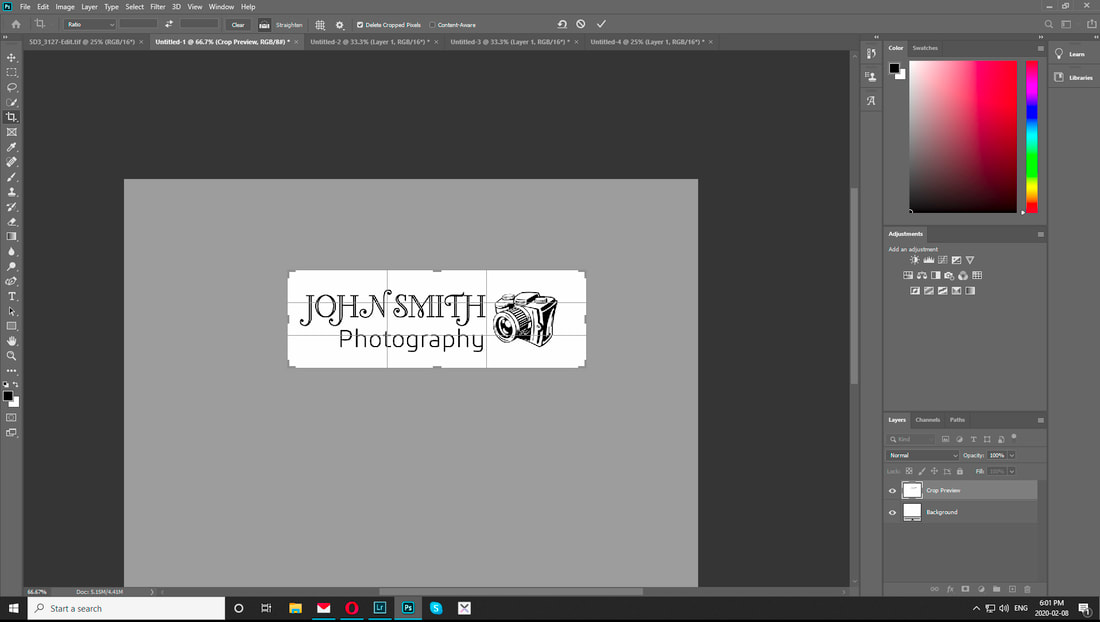
Use the crop tool to cut your image size down to something like I have in the image right.
Step #5
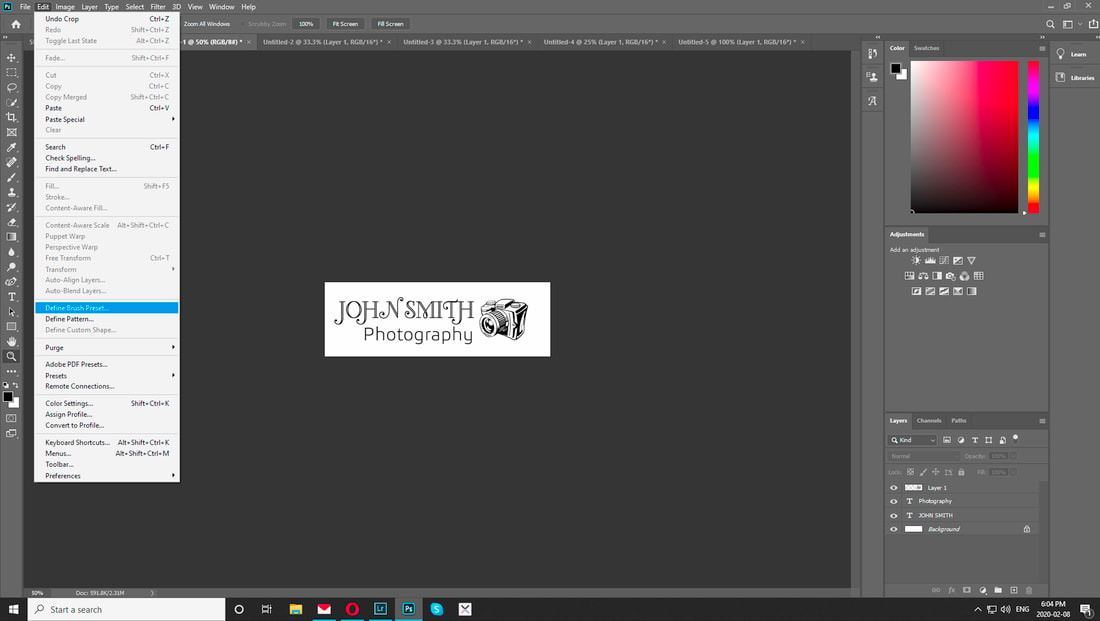
Now comes the fun stuff ... Click and drop down from Edit and select "Define Brush Preset"
Step #6
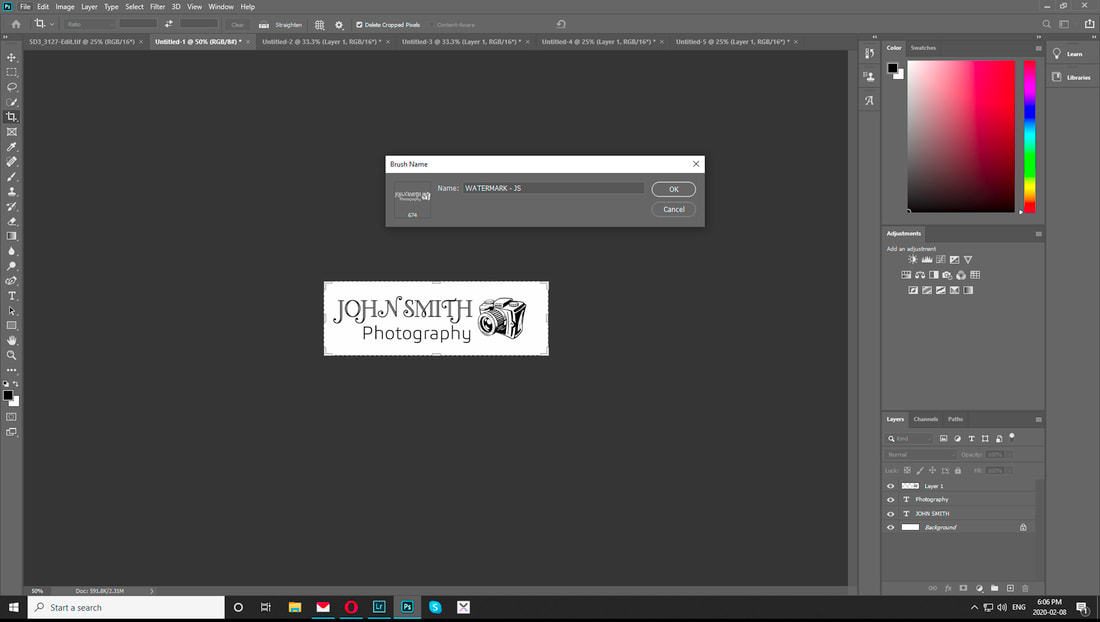
Give your Watermark a name that works for you, then press OK . You have now created a Watermark ... great job!
Step #7
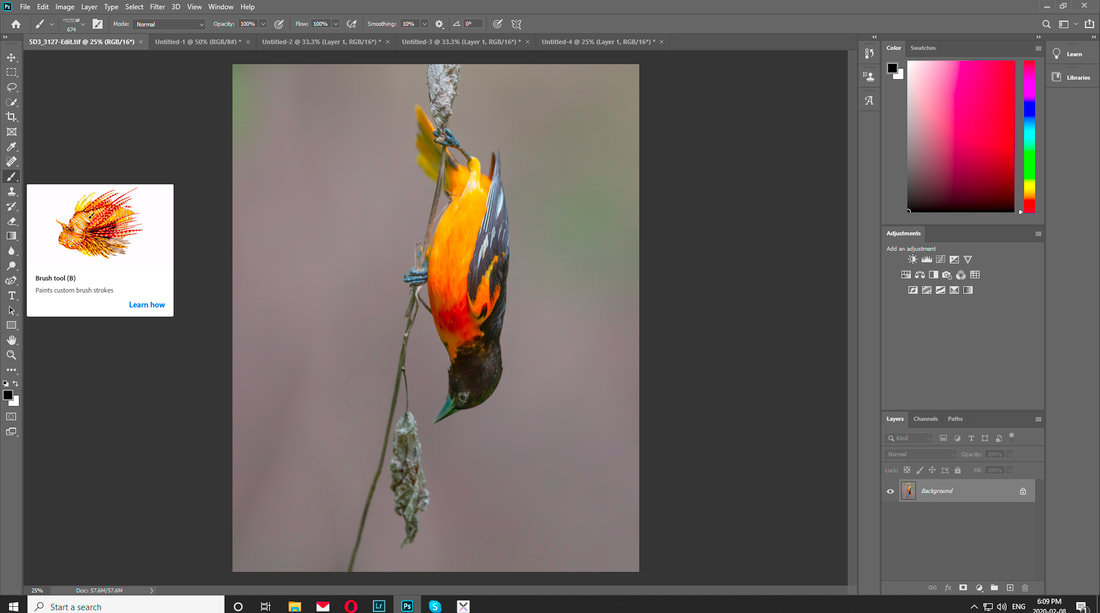
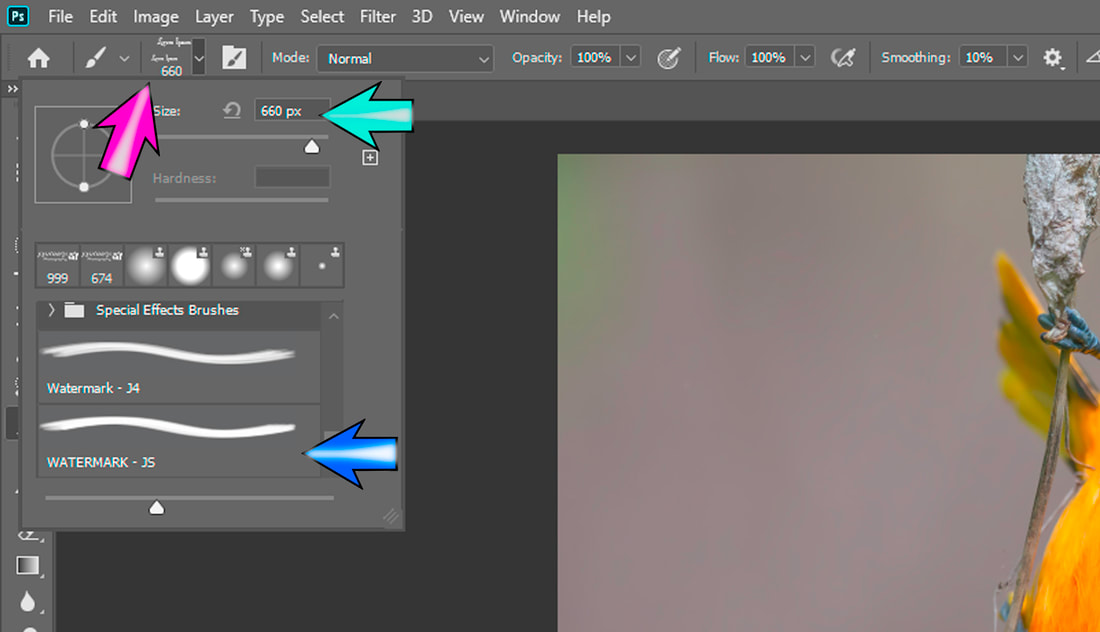
To add that watermark to your chosen image, go to the side toolbar and select the "Brush Tool", then drop down the Brush tool (Purple arrow) . Select your new Watermark (using the Dark Blue arrow) and finally change the brush size to suit your image (using the Light Blue Arrow).
Step #8
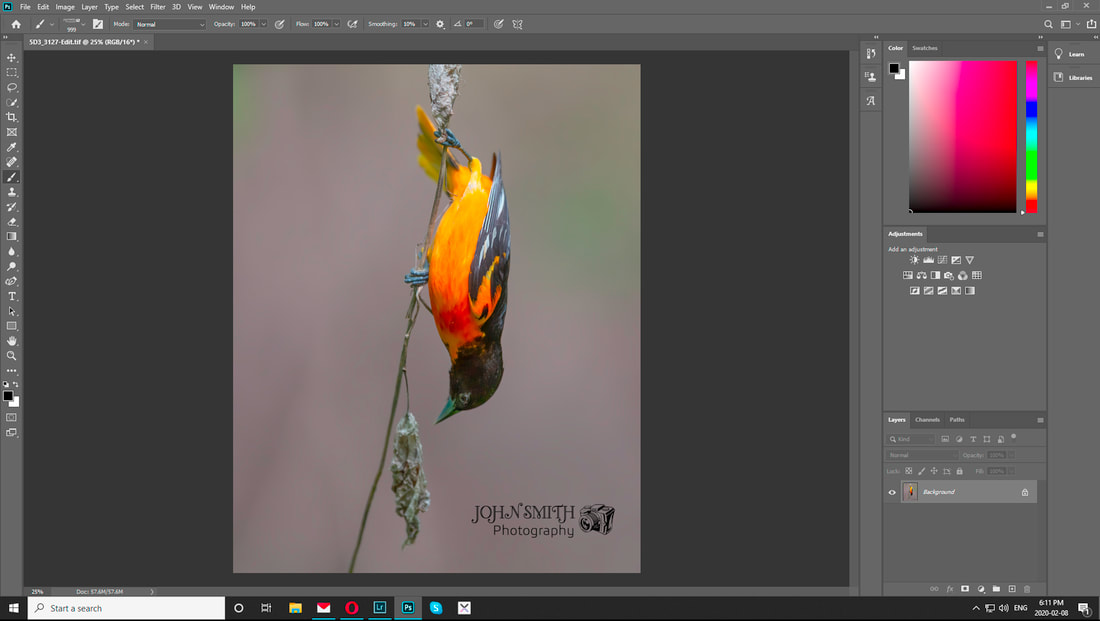
AND FINALLY ... drop your watermark onto your chosen image, and position to where it looks best. You can, if you like, rotate the watermark, by pointing to any corner and selecting the curved arrow. Have fun
REMOVE AN OBSTRUCTION
There is nothing more annoying when after taking that killer shot which is perfectly exposed, razor sharp etc and that you find that there is a branch or something else in the way, or somehow distracting. There are several ways to solve this problem and turn that disappointing shot into a super image. Here's how we can solve the problem .....
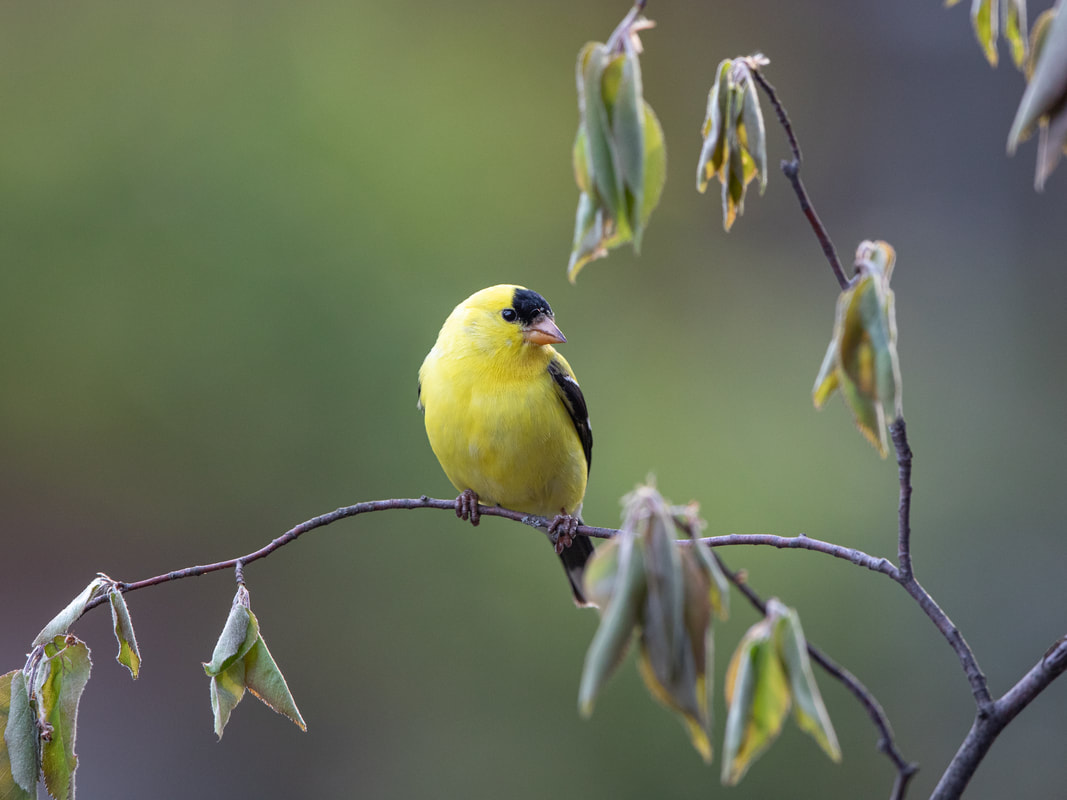
You've taken the shot and now you are back at home and starting the post processing stage. The photo looks great but it could be even better if there wasn't the obstructions at the tail of the bird, as well the distracting cluster of leaves etc just above the bird. etc .You are asking yourself if it's ethically acceptable to make modifications at this stage. My answer is always ... absolutely - the Photoshop part of the process is part of the artistry of Photography. So if you agree then lets go get it done ........
Step 1
So after getting the image opened up in Photoshop we need to have a basic plan as to what have to do. My thoughts are the tail is partly obscured by the leaves, so a) I would like to remove part or all of those leaves. b) the other annoying feature for em is the cluster of leaves just above the birds head.... so now we have a plan of attack.
Lets deal with the easier of the two first and get rid of those leaves.
Lets deal with the easier of the two first and get rid of those leaves.
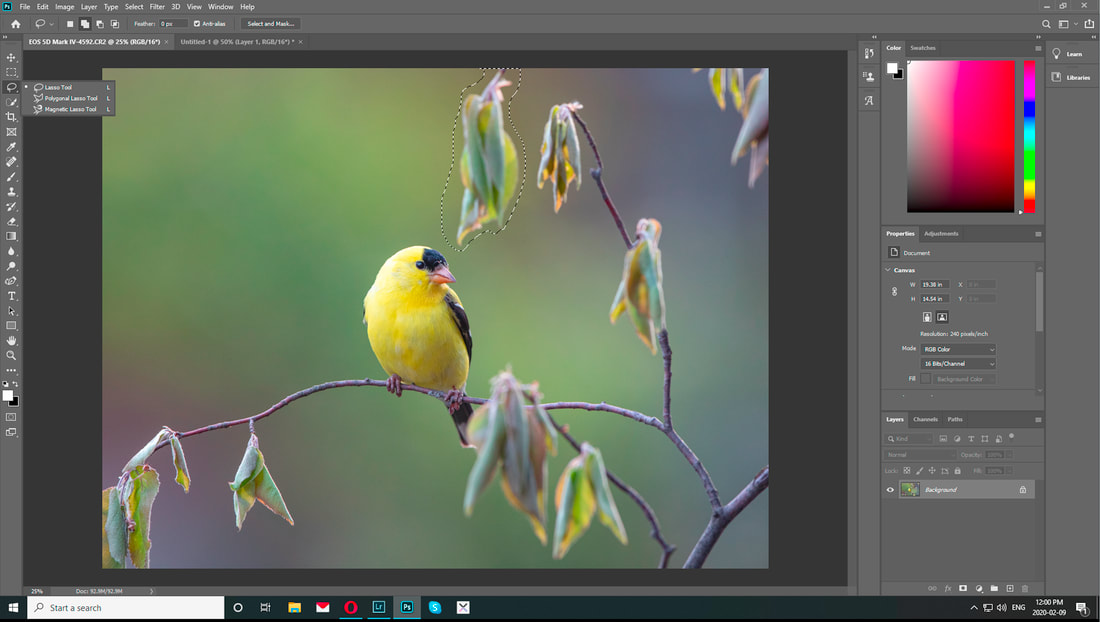
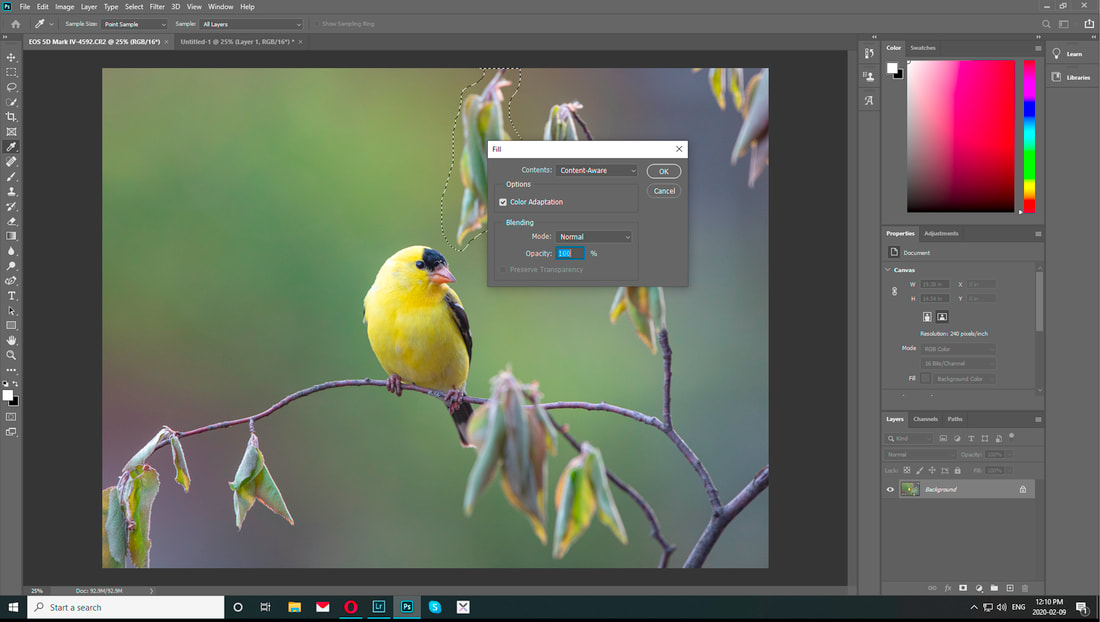
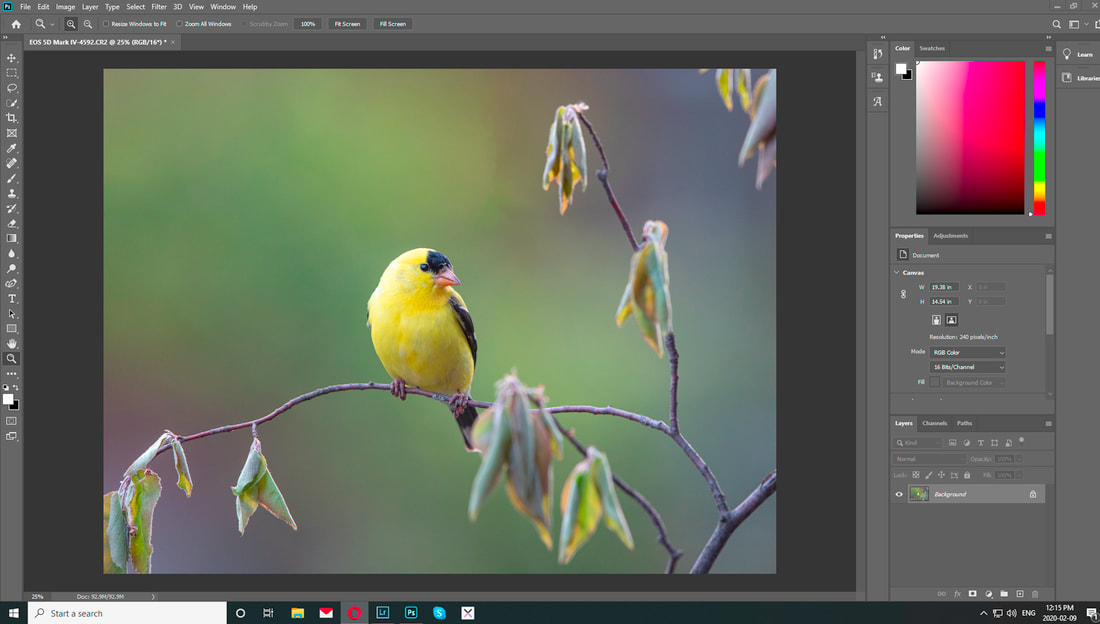
From the toolbar on the LH side use the Lasso tool to draw a marquee around the offending component. Try to keep it reasonably tight to the item, but not touching. Once done go to Edit on the top toolbar and scroll down and hit Fill (Shift F5). and after making sure that the contents are set to Content Aware click OK Finally from the Top menu click and deselect that selection (or Ctrl D). Now you should have something like this below. If it's not totally clean then repeat the process.
The next step is a little trickier, and will need some of your artistic abilities
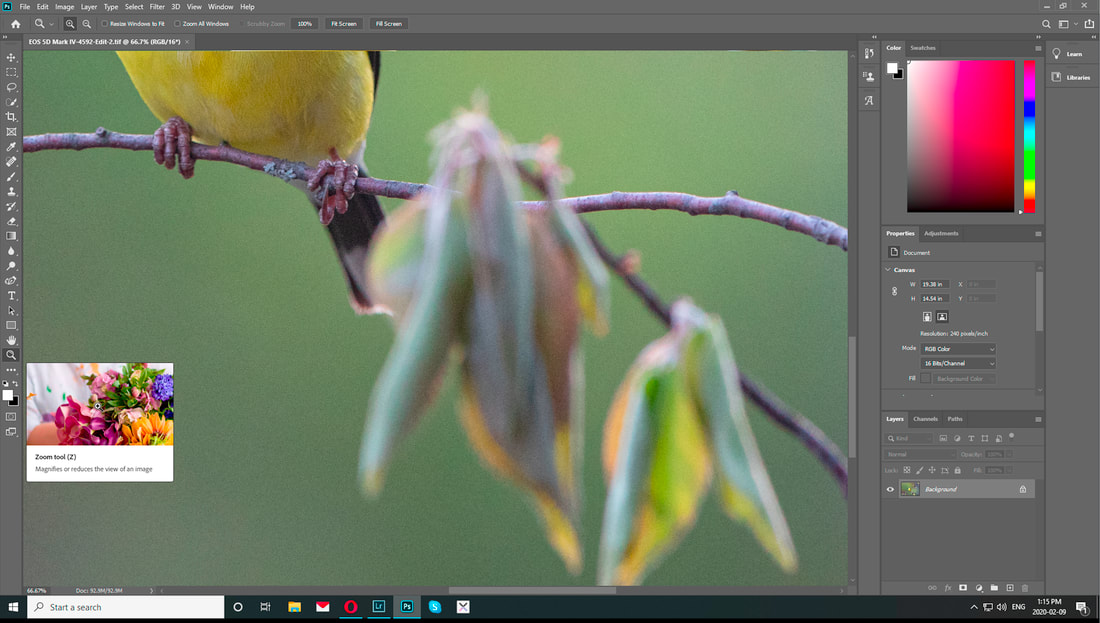
First lets zoom in on the area we want to work on using the Zoom Tool.
First lets zoom in on the area we want to work on using the Zoom Tool.
Because the tail of the bird is what we are trying to open up, lets work on that first. I like to use the Clone Stamp Tool for this type of problem, and it can be accessed from the LH side toolbar ....
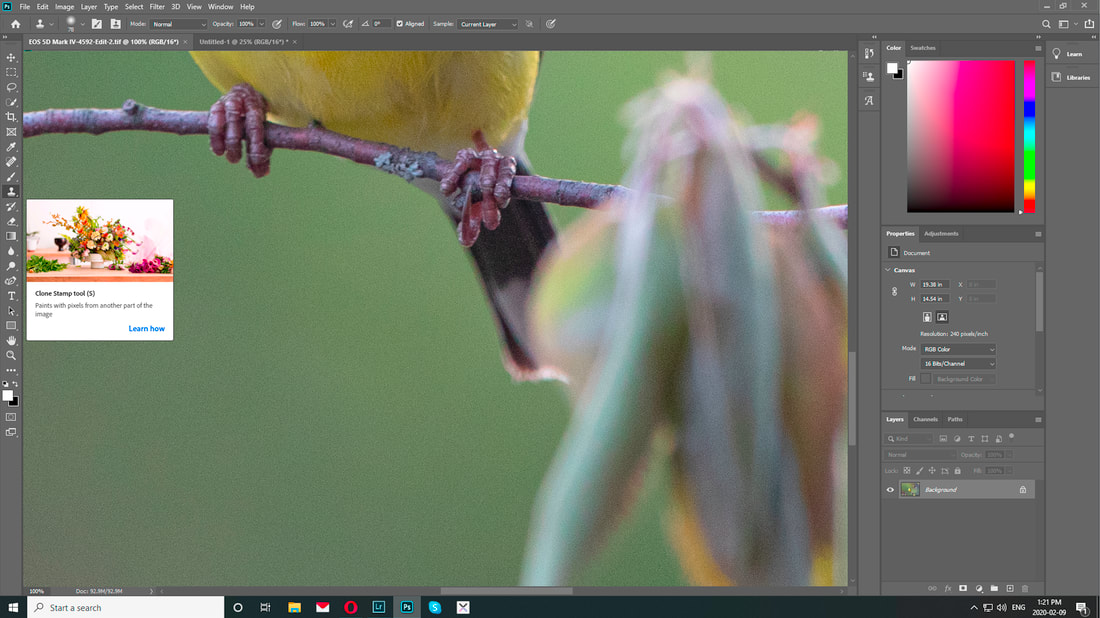
Click on the Brush Tool located on the top Toolbar, and adjust your brush type to Soft Round (it seems to work best), and the Brush size to something quite small relative to the tail of the bird. To start leave the Hardness at 0. The Mode should be at "Normal" and the Opacity at 100% ( to begin with).
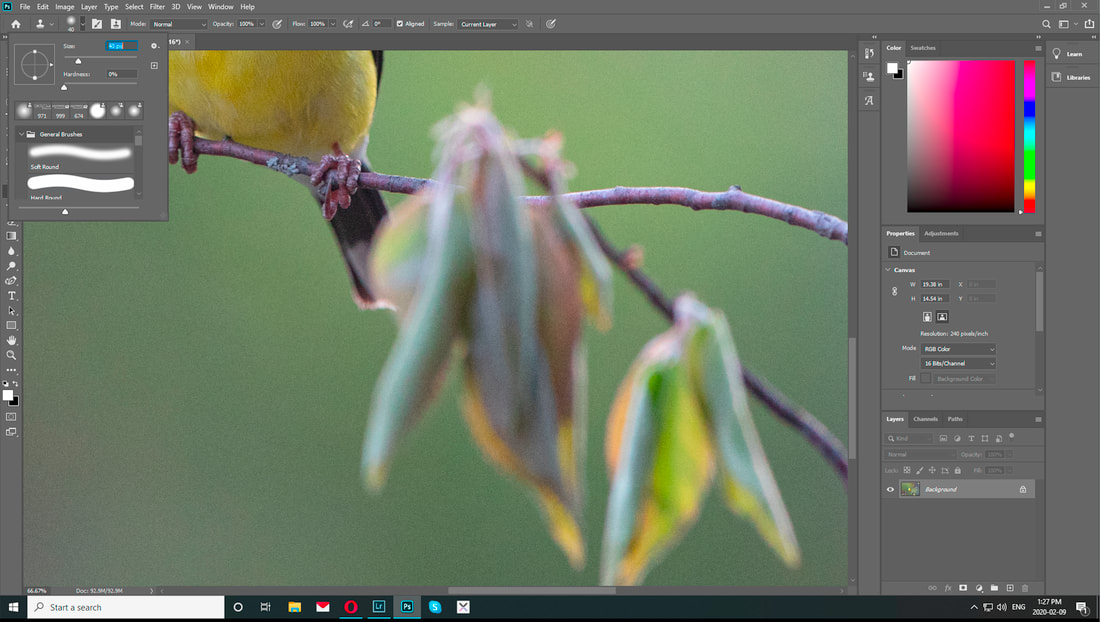
Resize the tool so that its quite small relative to the tail - we are going to attempt to "copy" parts of the tail which are exposed into the hidden area of the bird's tail. Hold the Alt key to create the "copy from" , then release the Alt key at your starting point of the "paste". Follow the natural line of the tail to create the illusion.
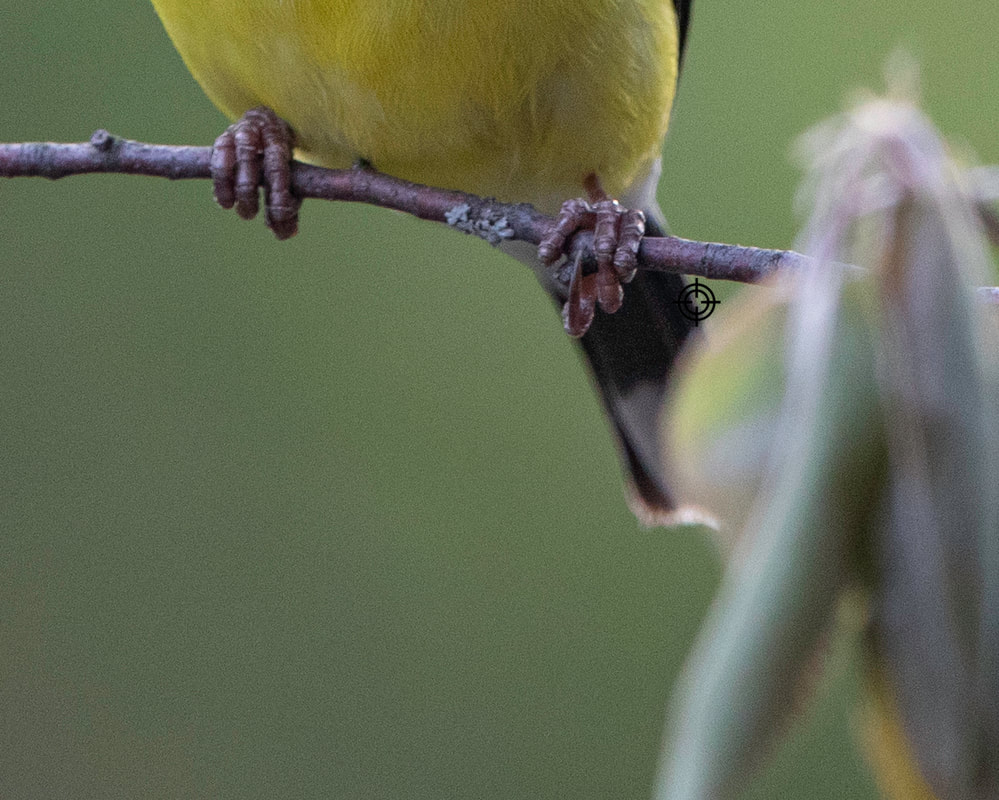
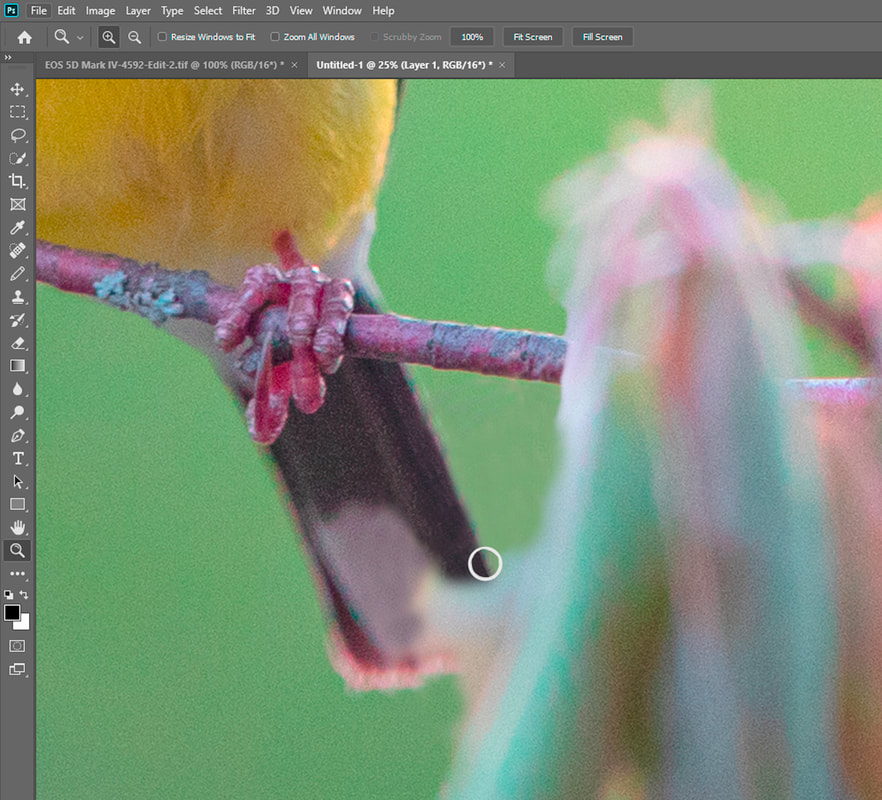
Image above is partially done and you can see that tail is coming together, and the image with the tail "exposed" below.
At this stage we could consider the image complete, but it could be that you might want to completely remove that portion of the leave cluster. as in the image below which was effected by basically continuing with the technique described above.
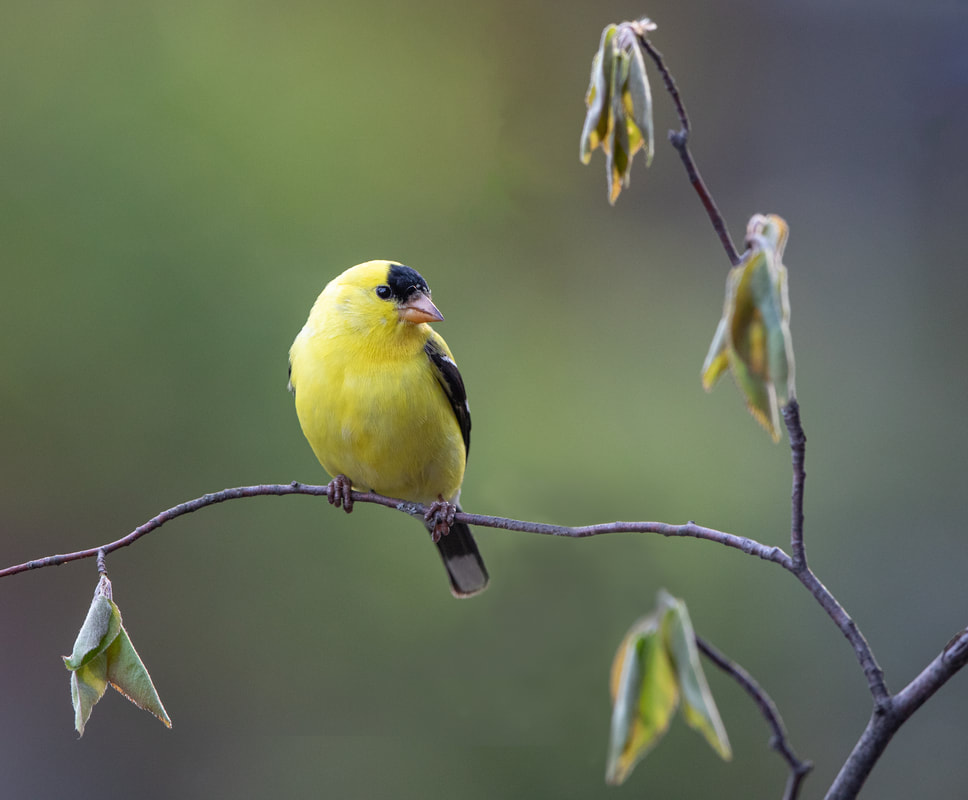
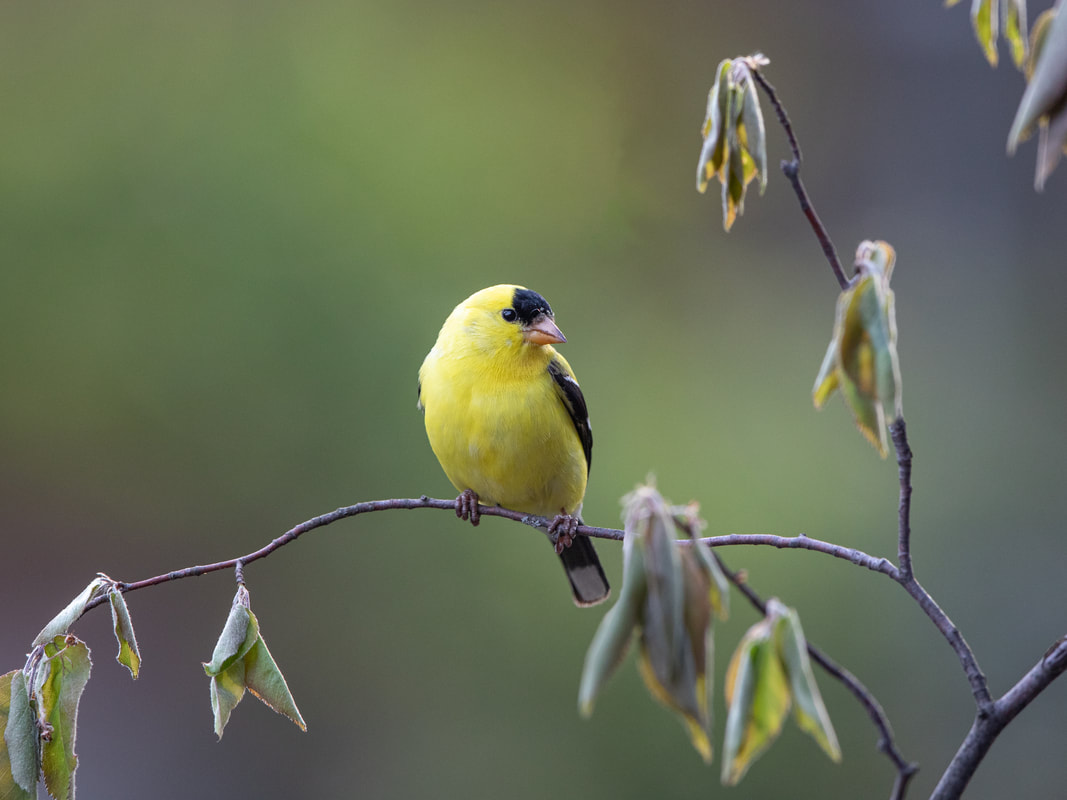
So with the final "patching" and with a bit of final cropping we have the final image.